Steps To Building Your Outdoor Kitchen
Share
Are you a grill enthusiast who loves spending time outdoors? Do you enjoy hosting gatherings and cooking meals for your family and friends? If so, building your own outdoor kitchen can be a fantastic addition to your backyard. Not only does it provide a convenient space for cooking, but it also creates an inviting atmosphere for outdoor entertaining. In this blog, we will guide you through the steps for building your own outdoor kitchen, helping you transform your backyard into a culinary oasis.
Step 1: Planning and Design
The first crucial step is to plan and design your outdoor kitchen. Consider factors such as the available space, your cooking needs, and the overall aesthetic you want to achieve. Determine the layout, including the location of the grill, countertop space, sink, storage, and any additional features you desire. Take measurements and create a rough sketch to visualize the placement of various elements.
Step 2: Choosing the Right Location
Selecting the right location for your outdoor kitchen is key. Take into account factors like wind patterns, proximity to your indoor kitchen, and the overall flow of your outdoor living space. Ensure that you have proper access to utilities such as water, electricity, and gas if required. Also, consider elements like shade, privacy, and ventilation when deciding on the perfect spot.
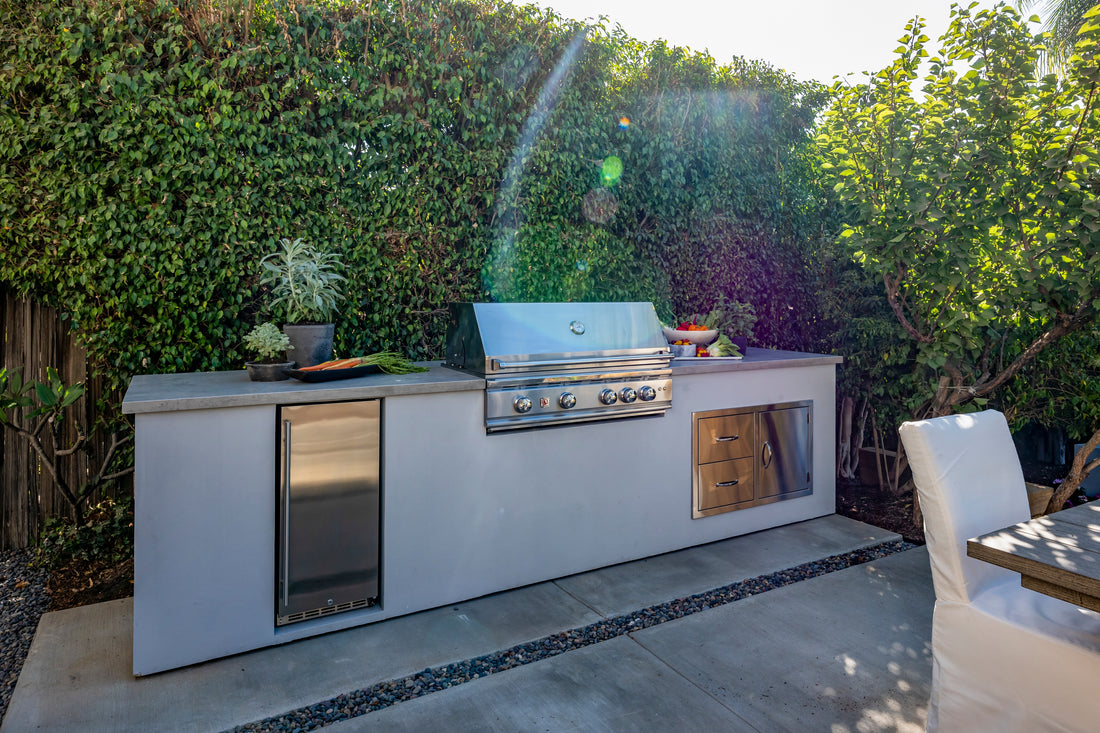
Step 3: Selecting Appliances and Materials
Choose high-quality appliances and materials that are suitable for outdoor use and can withstand various weather conditions. Stainless steel appliances are a popular choice due to their durability and resistance to corrosion. Opt for weatherproof cabinets, countertops, and flooring materials that are easy to clean and maintain. Don't forget to include essential appliances like a grill, sink, refrigerator, and storage options based on your cooking preferences.
Step 4: Building the Structure
Once you have planned the layout and gathered the necessary materials, it's time to build the structure of your outdoor kitchen. This step may involve constructing a frame, installing countertops, cabinets, and any other customized features you desire. If you're not confident in your carpentry skills, consider hiring a professional contractor to ensure a sturdy and well-built structure.
Step 5: Plumbing and Electrical Work
If your outdoor kitchen requires plumbing and electrical connections, it's important to hire a licensed professional for these tasks. They will ensure that the installation meets safety standards and local codes. Connect the water supply to the sink, install proper drainage systems, and consider adding outdoor lighting to enhance both functionality and ambiance.
Step 6: Finishing Touches and Decor
Now that the major components are in place, it's time to add the finishing touches and decorate your outdoor kitchen. Consider adding a pergola or canopy for shade, installing outdoor seating for guests, and incorporating greenery through potted plants or a herb garden. Personalize the space with decorative elements that reflect your style and create a welcoming atmosphere.
Step 7: Maintenance and Upkeep
To keep your outdoor kitchen looking and functioning its best, regular maintenance is essential. Clean the grill and appliances regularly, wipe down surfaces, and protect them from harsh weather conditions when not in use. Consider investing in covers or shelters to protect your outdoor kitchen during the offseason. Regularly inspect and maintain plumbing and electrical connections to ensure everything remains in good working order.
Conclusion
Building your own outdoor kitchen can be an exciting and rewarding project that enhances your outdoor living experience. By following these steps, from careful planning to the finishing touches, you can create a functional and aesthetically pleasing space where you can indulge in your passion for cooking while enjoying the beauty of the outdoors. So, roll up your sleeves, gather your tools, and start building your dream outdoor kitchen today!
The FireFlyFlame Team